Floor Heating Installation Design
3.1 Design the Installation
3.1.1 Measure the heated area*
Determine the heated area of the floor where there are no permanent fixtures or furniture such as showers, toilets, vanities, or cabinets. Measure the heated area of the floor. For example, if the area of the bathroom is 96 ft2, but when the area of the vanity, shower and toilet is subtracted, the total heated area is only 74 ft2.
3.1.2 Determine the power supply voltage
The available supply voltages include 120V, 208V or 240V.
Important: Operating the 240V cable at 208V reduces the power output to approximately 9W/sq.ft. (25% reduction)
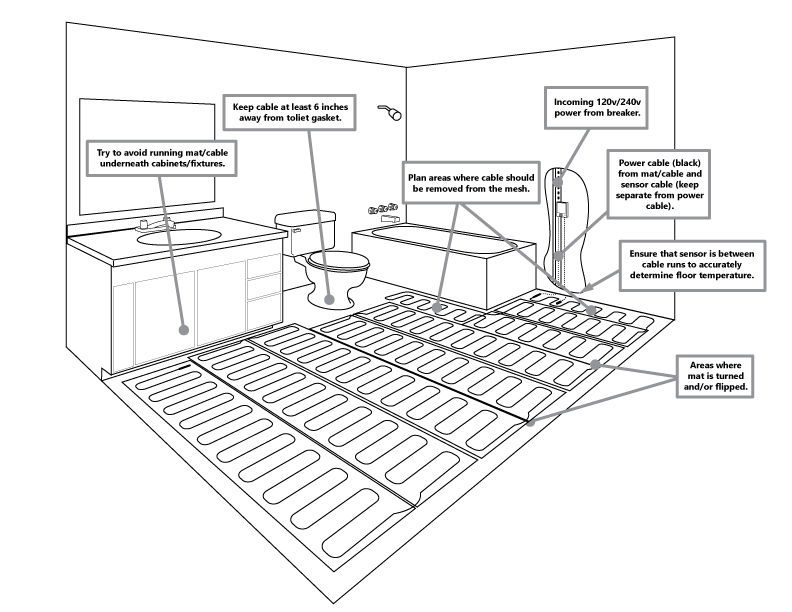
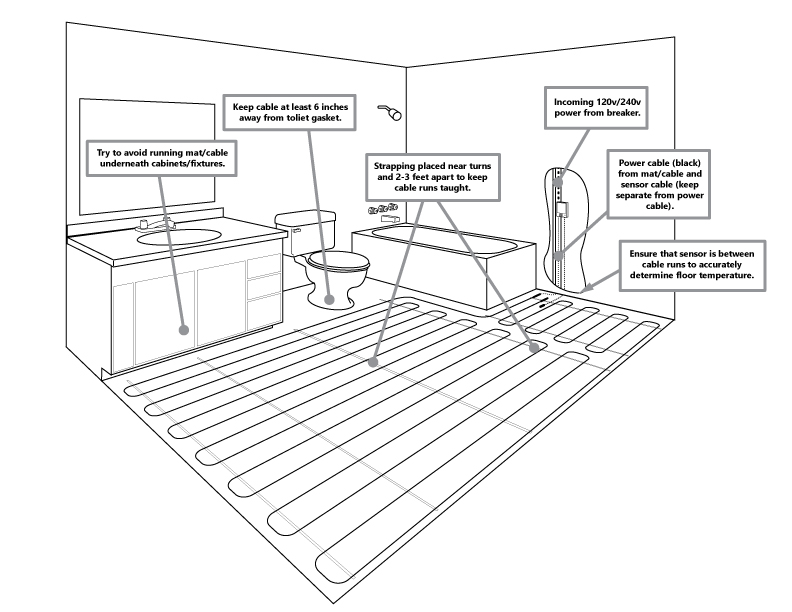
3.1.3 Plan the design*
Determine the optimum Heatwave® Cable or Mat layout for the heated area to ensure coverage. Select a spot for the thermostat in the wall above the heated area where it can be reached by the ten foot cold lead on the Heatwave, and the length of the floor temperature sensor.
Important: The predetermined Heatwave® spacing must be maintained to ensure proper floor heating. To avoid cold areas on the floor, do not change the Heatwave® heating cable spacing when laying out the Mat or Cable.
*If Installing Multiple Heatwave® Systems:
If the installation requires multiple Heatwave® units on one or two circuits, please see EXPANDING HEATWAVE before proceeding to address specific issues dealing with multiple Heatwave® Mats or Cables.